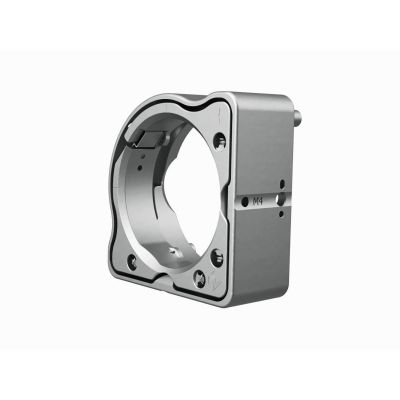
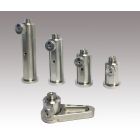
50.8-mm mirror mount, stainless steel, high-stability, front-loading, 2 hex adjusters
MHX-50.8A
Higher moment of inertia to maximize stiffness and faster to reach thermal equilibrium characteristics are achieved by a hollow-frame design. Ideal for interference measurement or precision measurement.
Please check for an introduction video of the structure and features of MHX.
Please check for an introduction video of the structure and features of MHX.
◦The mirror can be inserted from the back of the holder and fixed so that the reflecting surface of the mirror stops at the butt of the mirror frame with MHX-25.4F-R. This ensures that the reflecting surface of the mirror is always aligned with the mounting center of the rod, even if the thickness of the mirror changes. (For MHX-***F/A, the mirror is inserted from the front of the holder; for MHX-12.7F-R, the mirror is inserted from the back, but the rod cannot be attached.
◦MHX-***F/F-R has three adjustment axes screws that allow the reflecting surface to be moved back and forth in addition to the adjustment of tilt and rotation. (MHX-***A has only 2 axes of adjustment screws, so it can only be used for adjustment of tilt and rotation.
◦Adhesive holes for mirror adhesion and pin holes for anti-rotation and positioning are equiped.
◦High-density stainless steel is used for the material, but the weight has been reduced by reducing the thickness.
◦The frame design provides a higher moment of inertia to maximize stiffness and reduced-mass sections allowing it to reach thermal equilibrium faster for maximum stability.
| Name | 50.8-mm mirror mount, stainless steel, high-stability, front-loading, 2 hex adjusters |
|---|---|
| Weight | 0.3500kgs |
| Guide |
In addition, a special screwed knob (MHX-K-M6) is also available instead of the hexagon wrench.
|
| Optic Loading Side | Front Loading |
| Angle Range | ±3° |
| Material | Stainless Steel |
| Number of Control Axes | 2 points |
| Optic Diameter | φ50.8mm |
| Mount Material | Stainless Steel |
| Compatible Optics Diameter | 50.8mm |
| Compatible Optics Thickness | 5 - 13mm |
| Mirror Clamping Mechanism | Set Screw with Torsion Barrier, 2-mm (5/64-in.) Hex Key |
| Recommended Mirror Clamping Torque | 0.07±0.01 Nm (10±2 oz.-in.) |
| Number of Adjustment Axes | 2 points |
| Angular Travel Range | ±3° |
| Linear Travel Range | ±3.5mm |
| Adjuster Thread | M6 x 0.250mm (~100 TPI) |
| Standardized Adjustment Sensitivity (based on 1° knob rotation) | 13 μrad |
| Typical Adjustment Sensitivity | 4±2 μrad |
| Dowel Pin Keys | ɸ2mm Slot and Hole |
| Standard Mounting | Counterbored clearance hole for M4 / 8-32 screws |
| Center-Post Mounting | M4 and 8-32 threaded holes |
| Thermal Repeatability with a Δ10°C Thermal Cycle | ≤1.5 μrad |
Out of stock
SKU
MHX-50.8A
€196.10
Higher moment of inertia to maximize stiffness and faster to reach thermal equilibrium characteristics are achieved by a hollow-frame design. Ideal for interference measurement or precision measurement.
Please check for an introduction video of the structure and features of MHX.
Please check for an introduction video of the structure and features of MHX.


